

Most people know that cooking at home is cheaper and usually healthier than ordering in, yet a busy week has a way of wrecking good intentions. A little preparation on one day can remove the nightly question of what is for dinner and keep half-used vegetables from rotting in the drawer.
In this article we will explore how to choose a prep style, shop with a plan, run a two-hour cooking session, store food safely and use up leftovers.
Choosing a Prep Style That Fits Your Week
Meal prep is not one method. It is a family of habits that runs from cooking every lunch for the week to simply washing and chopping vegetables so that a weeknight dinner takes fifteen minutes. Beginners often copy the most intense version they saw online, a neat row of identical containers, and abandon it by the second Wednesday because they are tired of eating the same dish. Pick the style that matches how you really eat, not how you wish you ate.
Fully portioned meals
Cooking complete meals and dividing them into containers suits people who eat a similar lunch at a desk every day and do not mind repetition. It is the quickest option at mealtime, since all you do is reheat. The trade-off is boredom and texture: crisp things go soft, and by day four a stir-fry tastes tired. If you go this route, prepare only three or four days at a time and freeze the rest as single portions.
Batch-cooked bases
Here you cook a few building blocks, such as a pot of grains, a tray of roasted vegetables, a batch of beans or lentils and one or two proteins, then combine them differently each day. One day it becomes a bowl with a sharp dressing, the next a wrap or a quick fried rice. This is the style I recommend to most beginners because it keeps variety while still saving effort, and it forgives mistakes, since nothing is committed to a single recipe.
Ingredient prep only
If your evenings are unpredictable, washing greens, chopping onions and peppers, cooking a pot of rice and shaking up a jar of dressing may be all you need. You still cook each night, but the slow, fiddly parts are already done. This style also produces the least waste, because you are not locked into portions that nobody wants on Thursday.
Choosing between them
A simple test is to ask which moment in your week hurts most. If it is the lunch decision, portion full meals. If it is arriving home hungry at seven with nothing planned, batch-cook bases. If you cook happily but hate the chopping, prep ingredients. You can change styles any week, and most experienced preppers end up blending two of them.
Matching the style to your household
Your household changes the answer more than any blog post. A single person with one fridge shelf has little use for a ten-container system, while a family of four may find that cooking a double batch of one dinner is the only thing that works. If children are fussy, prepare plain components, such as cooked pasta, chicken and cut vegetables, and let everyone assemble their own plate.
If one adult works late, set aside a labeled container that can be reheated without any fuss, and agree on who is allowed to eat it. Cooking skill matters too. If you are still learning, choose recipes you have made before at least once, because a new recipe in a big batch can fail loudly on four lunches at the same time. Try new dishes in a single portion first, then scale up the ones you liked.
Planning the Menu and Shopping List
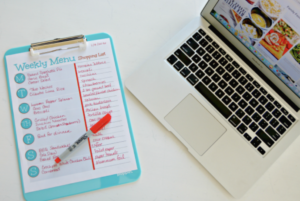
Planning is where most food waste is prevented, long before anything goes in a pan. Start by looking at what you already own: the freezer, the back of the pantry, the vegetable drawer. Anything that will spoil soon should shape the first meals of the week, and anything that keeps well can wait. Ten minutes of looking saves you from buying a fourth jar of mustard.
Building a simple menu
Think in a formula rather than in recipes. A workable week usually has one or two proteins, two grains or starches, three or four vegetables in different colours and textures, and one or two sauces that change the character of everything else. Plan for weekday lunches or dinners only, and leave the weekend loose.
It also helps to name one flexible night, a leftovers night or a takeaway night, so that a late meeting does not turn into a failed plan and a wasted container. A beginner mistake is planning five different recipes with five different shopping lists. Choose recipes that share ingredients. If you buy a bunch of coriander, make sure it appears in at least two dishes, otherwise most of it ends up as green sludge by day six.
Writing a list that matches the menu
Write the list by store section, not by recipe, so that you walk the shop once. Put quantities next to every item, and check them against the recipe rather than guessing. Where you can, buy loose produce in the amount you need instead of the large bag that is cheaper per kilo but half of which you will throw away. Frozen vegetables and frozen fruit are a sensible safety net, because they do not spoil while you decide what to do with them.
Shop with the cheapest honest comparison in mind. Dried beans and lentils cost far less than ready meals, whole chickens and bone-in cuts usually cost less per portion than neatly trimmed ones, and seasonal vegetables tend to be both cheaper and tastier. Prices and what is in season differ widely by country and by store, so rely on your own receipts instead of a rule from a magazine. If a discount tempts you, ask one question at the shelf: which meal on my plan will this go into? If you cannot answer, leave it.
Estimating portions
Portion sizes depend on appetite, body size and activity, so treat any rule as a starting point. A commonly used hand guide is a palm-sized portion of protein, a cupped handful of cooked grains or starch and as many vegetables as will fit in two hands. Remember that dry rice and pasta roughly double or triple in volume when cooked, which catches many beginners out and leaves them with a week of rice. If you have a medical condition, are pregnant or follow a special diet, a registered dietitian can set portions that fit your needs.
A sample week on paper
To make this concrete, imagine a plan for five weekday lunches. On the shopping day you buy chicken thighs, a bag of brown rice, a tin of chickpeas, a head of broccoli, two peppers, a cucumber, a lemon, a tub of yogurt and a bunch of coriander. On prep day you roast the chicken and peppers on one tray, boil the rice, simmer the chickpeas with tomato and spice, steam the broccoli and mix a yogurt and lemon sauce. On Monday the lunch is chicken, rice and broccoli with the sauce.
On Tuesday it is chickpeas over rice with cucumber. On Wednesday the chicken goes into a wrap, and by Thursday whatever remains becomes a rice bowl with fried peppers. Nothing is boring, and nothing is bought that is not used at least twice. Notice that the whole week used about nine ingredients and a few pantry staples. Short lists are a feature, not a limitation, and they make the shop faster and cheaper.
A Sunday Prep Session, Step by Step
You do not need to prep on Sunday, but a single fixed session is what makes the habit stick. Aim for about two hours the first time, including cleaning up, and do not try to cook more than you have room to store. The secret is not speed. It is the order in which you do things, so that the oven, the hob and your hands are all working at once.
Before you start
Clear the counters, empty the dishwasher and put the washing-up bowl in the sink. Take out the containers you plan to use and check that lids match, because hunting for a lid with hot food waiting is a small misery that ends many prep sessions. Read the whole plan once, and set a timer on your phone for each long task. A tidy start usually matters more than any clever recipe.
Good equipment helps, but you need less than you think. Two large baking trays, one big pot, one frying pan, a sharp knife and a board you trust will carry most plans. A rice cooker or a slow cooker is useful because it works without supervision, and a set of matching, stackable containers makes the fridge easier to organise. Glass containers reheat well and do not stain, while good plastic ones are lighter to carry. Avoid buying a large set of gadgets before you know which tasks you dislike.
The order of work
Begin with whatever takes longest and needs least attention. Turn the oven on and get a tray of root vegetables or a whole chicken in. Put the grains on the hob or in a rice cooker. While those run, wash and chop the vegetables for raw dishes and the ones that will cook on the hob. Next start the pot of beans, stew or sauce that needs occasional stirring. Last, make the cold items: a jar of dressing, a quick pickle, boiled eggs, a grated carrot salad.
A rough timeline for a first session might be the oven in at minute five, the grains on at minute fifteen, chopping until minute forty, hob cooking until minute eighty, and the final fifteen minutes for packing and washing up. Do not expect perfect timing. By the third week you will find your own rhythm and know which dish always runs late.
Cooling and packing
Hot food packed in a sealed container stays warm for hours, which is exactly the condition bacteria enjoy. Spread cooked food in shallow containers, leave the lids ajar or off until the steam stops, and get it into the fridge within about two hours of cooking. Keep dressings, crunchy toppings and fresh herbs in separate small containers, and combine them on the day you eat. This one habit solves most of the soggy-lunch complaints.
Clean as you go. Fill the sink with hot soapy water at the start, wash each tool when you finish with it, and wipe the board between raw meat and vegetables. A kitchen that is a disaster at minute ninety makes people give up on the whole idea, whereas one that is nearly clean makes you want to do it again next week.
Storage, Labeling and Food Safety
Prepared food is only a bargain if you can eat it safely. Most food authorities commonly recommend a fridge that runs at or below about four degrees Celsius, which is forty degrees Fahrenheit, and a cheap fridge thermometer is the easiest way to check yours. Cooked food should be cooled quickly and, in most guidance, eaten within three to four days. Reheat until it is steaming hot all the way through, commonly given as about seventy-four degrees Celsius or one hundred and sixty-five degrees Fahrenheit, and do not reheat the same portion more than once.
Fridge times at a glance
The table below gives rough, commonly published ranges. They vary a little between countries and agencies, and they are guides, not guarantees, so when something looks, smells or feels wrong, throw it out.
| Food | In the fridge | In the freezer (best
quality) |
Practical note |
| Cooked meat and poultry | Three to four days | Two to three months | Reheat until steaming hot |
| Cooked beans and lentils | Three to four days | Up to three months | Freeze flat in bags to thaw quickly |
| Soups and stews | Three to four days | Two to three months | Cool in shallow containers first |
| Cooked rice | One to two days | About one month | Cool fast; guidance is
stricter in some countries |
| Chopped raw vegetables | Three to five days | Not recommended for most | Keep dry with a paper
towel in the box |
| Homemade dressings | A few days | Not recommended | Label with the date made |
Rice and other special cases
Cooked rice deserves its own warning, because a bacterium that survives cooking can multiply if rice sits warm, and reheating does not always remove what it produces. Cool rice quickly, refrigerate it promptly and eat it within a day or two. Some countries advise a stricter limit than others, so follow the guidance where you live. People who are pregnant, elderly, very young or have weakened immunity are usually told to be more careful with leftovers, and a doctor or the national food safety body can give advice for your situation.
Freezing and labeling
Freezing is the best answer to the question of what to do with the fourth and fifth portions. Freeze them on the day you cook, not on the day you notice they are about to turn. Use freezer bags squeezed flat, or containers with a little space at the top for expansion. Label every item with the name and the date, because frozen chili and frozen bolognese look identical in a month. Thaw in the fridge overnight where possible, and cook or reheat promptly afterwards.
Reheating without ruining the food
Reheating is where good prep is often lost. Add a spoonful of water or stock to rice and grains before microwaving, cover loosely and stir halfway, because dry food heats unevenly and leaves cold spots. Roasted vegetables recover better in a hot oven or a dry frying pan than in a microwave, and breaded or crisp foods prefer an oven or air fryer. Soups and stews should be brought to a gentle boil on the hob. Whatever method you use, check that the middle is steaming hot, not just the edges.
Using Leftovers and Trimming Waste
The point of prepping is to waste less, and that needs a few small systems rather than good intentions. Keep a clear shelf or box in the fridge for anything that must be eaten first, and put new containers behind older ones. Professionals call this first in, first out, and it works just as well in a home fridge. When you open the door and see the oldest food at the front, you eat it.
Try a two-week experiment: every time you throw away food, write down what it was. Most households find the same few offenders, usually salad leaves, fresh herbs, bread and cooked leftovers nobody fancied. Once you know your pattern you can buy a smaller amount of that item or switch to a frozen version. This is more useful than any general tip, because waste is highly personal.
The end of the week is the time for the dishes that forgive anything. Leftover vegetables go into a soup, a frittata or a fried rice, and a few spoonfuls of sauce can season a pan of beans. Herb stalks can be chopped into a dressing, soft herbs can be frozen in oil in an ice tray, and stale bread becomes crumbs or croutons. Overripe bananas and berries belong in the freezer for smoothies rather than in the bin.
Be careful that saving food does not turn into eating food that has gone off. A reasonable rule is that a date on a label and the guidelines in the table are your limit, and any food that smells sour, looks slimy or has visible mould goes in the bin, whatever it cost. Reusing leftovers is a skill, but so is knowing when to stop.
Packaging is a hidden source of waste as well. A half-used tin of tomatoes decanted into a jar keeps for several days in the fridge, a lemon half stored cut-side down in a covered dish stays usable, and a bunch of spring onions kept upright in a glass of water lasts far longer than one wrapped in its plastic sleeve. These are small habits, and together they add up to a fridge that wastes less without any extra cooking.
There is a stress benefit too, and it is not trivial. A fridge that holds a plan means fewer decisions at the moment you are least able to make them. If you notice that you are still ordering takeaway on the nights you prepped, do not read that as failure. It usually means a container held something you did not enjoy, so swap that recipe out next week.
Starting Small in Your First Month
The most common reason beginners quit is trying to cook everything at once. A better approach is to add one layer each week and keep the earlier ones only if they were worth it. Four weeks is long enough to learn what suits you and short enough that nothing needs to be perfect.
Week one
Prepare only three lunches or three dinners, and make them from food you already like. Write the menu on paper, shop once and cook for no longer than an hour. The aim is simply to finish the week with the food eaten and the containers washed.
Week two
Add a batch-cooked base, such as a large pot of grains or a tray of roasted vegetables, and use it across several meals. Notice which dishes you looked forward to and which you pushed around the plate. Keep a short note in your phone so that you repeat the good ones.
Weeks three and four
Add one freezer portion per recipe, and begin using your leftovers deliberately at the end of the week. By the fourth week, review honestly: how much did you throw out, how much did you spend compared with your usual week, and did you feel calmer on weeknights. If you cannot answer yes to at least two of those, change the style from the first section rather than trying harder.
A few common mistakes are worth naming so you can avoid them. The first is cooking for seven days when your fridge only safely holds four. The second is choosing recipes because they look appealing in a photo rather than because you have eaten something similar and enjoyed it. The third is ignoring your own schedule: if Thursday is always chaotic, plan nothing demanding for it and put a frozen portion on that day. The fourth is treating a missed week as the end of the habit. Nobody needs a streak, and an interrupted routine can be restarted on any Sunday you like.
One last tip from experience: keep a standing backup meal in the freezer that needs no thought, such as soup, a pasta sauce or a curry with rice. On the evening when the plan collapses, that portion is what stops an expensive impulse order, and it costs you nothing extra because you cooked it during a normal session.
If you share a kitchen, say so out loud before you start. Tell housemates which shelf your containers live on and which ingredients are earmarked, so that the dinner you planned for Wednesday is still there on Wednesday. A short note on the lid works well.
Food costs and food safety rules differ by country and by household, so treat the ideas here as general principles. If you manage a health condition such as diabetes, a food allergy or kidney disease, ask your doctor or a registered dietitian to review how you plan meals before you change your routine.
Frequently Asked Questions
How long does meal prep last in the fridge?
Most cooked dishes are commonly given three to four days in a fridge at or below four degrees Celsius. Rice and fish are usually advised for a shorter time. If you will not eat something by day three, freeze it.
Can you freeze meal prepped meals?
Yes, and it is the easiest way to prep more than four days ahead. Soups, stews, cooked beans, curries and most grains freeze well, while salad, crisp vegetables and fried foods do not. Cool the food first, label it and thaw it in the fridge.
How do I stop prepped food from getting soggy?
Store wet and dry parts separately. Keep sauces, dressings and crunchy toppings in their own small containers and add them just before eating. Roasted vegetables hold their texture better than boiled ones.
Is meal prep cheaper than cooking every night?
It usually is, mainly because you waste less and buy less on impulse. The saving depends on what you ate before and on where you shop, so track a few weeks of grocery spending before judging. Costs differ widely between countries.
How much time does meal prep take for a beginner?
Plan on about two hours for a first session, including shopping separately and cleaning up. Many people shorten that to ninety minutes or less within a month. A shorter session of one hour is a perfectly good place to start.
Is it safe to reheat rice?
It can be, if the rice was cooled quickly, kept in the fridge and reheated only once until steaming hot. The risk comes from rice left out at room temperature for hours. If you are unsure how long it sat, discard it.